This guide will teach you everything you need to know about customizing emails. From how to change the color of a text to how to add conditional text.
The Basics
You can create or customize emails by going to the Settings->Email Section
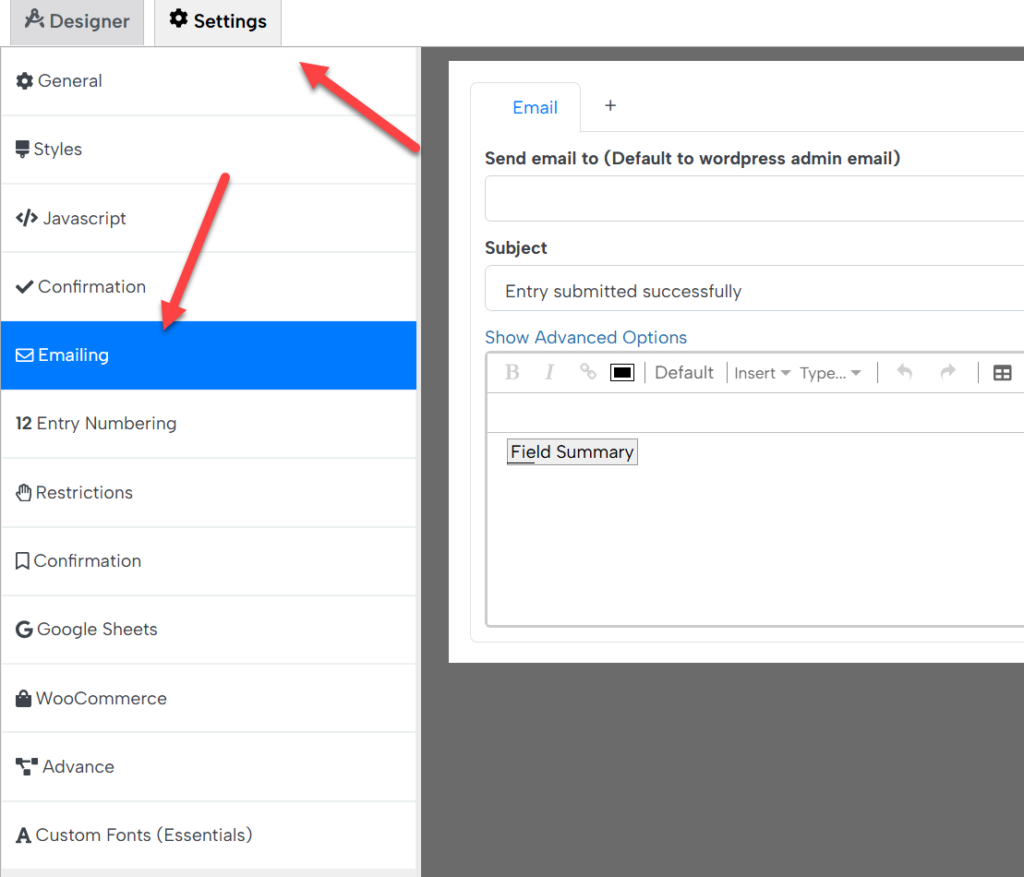
This is the email builder
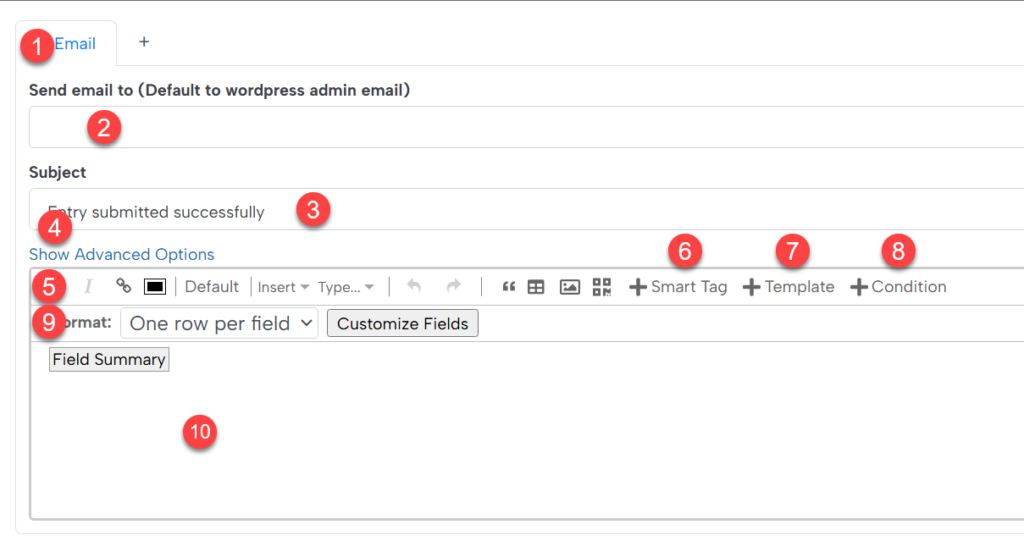
1.- Email Tab: The name of the email you are editing, if you have multiple emails created you can view each of them here.
2.- Send Email To: Here you configure where to send the email, there can be multiple recipients. You can use fixed emails, or fields (more about this later).
3.- Subject: The subject of the email, you can add fixed text of text coming from a field (more about this later)
4.- Show Advanced Options: Clicking this button will open more options that will let you further customize the email like adding a cc and bcc receipt or configuring a condition logic to send the email (More about this later)
5.- Toolbar: Here you can find tools that will let you customize the email like changing the font color, but text in bold, etc.
6.- Smart Tag: You can use this button to add fields to your email (Mre about this later)
7.- Template: Instead of adding all the fields one by one and formatting the email manually you can use a template. Currently, there is only one template which I will explain later
8.- Condition: You can use this button to add a block of content to your email that will be included only when a condition is met (more about it later)
9.- Secondary Toolbar: Some elements of the email have additional customizations, for example, the “Field Summary” element lets you configure its format. When you select an element with additional customizations, the secondary toolbar displays these customization options.
10.- Email content: Here you can customize the content of the email
Customizing the recipients of the email
In the “send email to” setting you can configure who should receive the email, you can add as many emails as you want.
Adding dynamic recipients
Sometimes you don’t know where to send the email in advance because it depends on how the form is filled. In this section, I am going to cover the most frequent cases.
Sending the email to the person who submitted the form
To send the email to the person who submitted the form first you need to add an email field to your form and make it required to force the user to fill it.
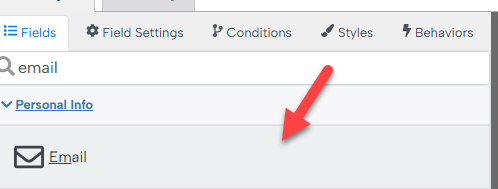
Then you just need to include that field in the “Send Email” setting

Sending the email from a list of options
Another typical case is when you have a form where the user selects from a list (for example a list of departments) and the email depends on the chosen option. To do that all you need to do is create your dropdown with the options. Put the email in the “Value” setting of each option.
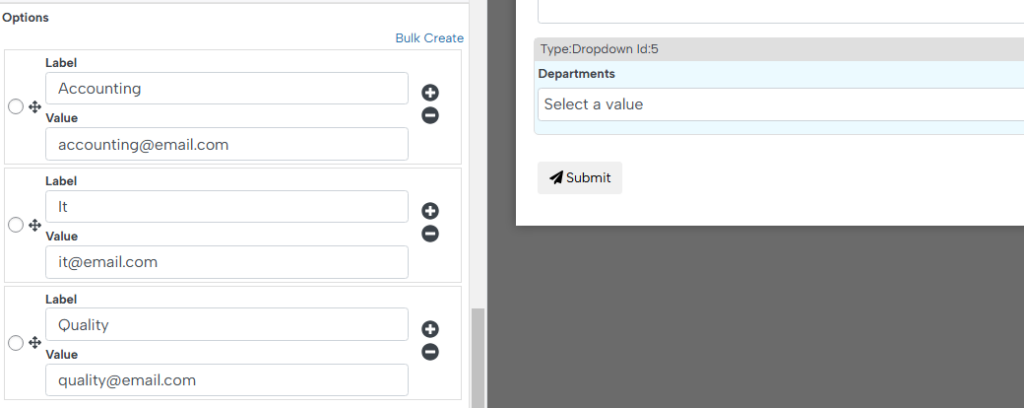
Then just add the field in your “Send email to” setting

Choosing the email recipient using a complex rule
You might want to choose the email address using a more complex rule. For example, you might want to generally send the email to address “A” but if the value of a field (let’s call this field quantity) is greater than x you want to send it to email B.
To do something like that you can add a hidden field to your form and then set up a formula like this:
Note: I won’t cover how formulas work in this tutorial because plugin documentation explains that topic in detail.

Then you just need to add that field to your “Send email to” setting
Customizing the subject of the email
When customizing your email the first thing you might want to do is change the subject. The subject of your email can contain text, information about the entry (like entry number), or a field of the form. To add any information about the form instead of just fixed text click on the tag icon.
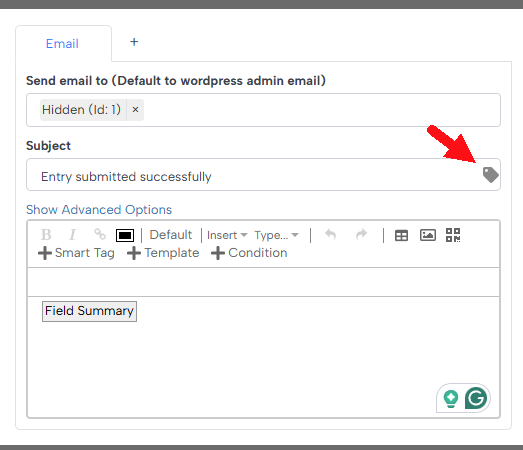
Then in the pop-up, you can select what info you want to add

Configuring when to send (or not) the email
You might want to send an email only when a condition is met. For example, you might choose to send an email only when the customers select a specific product. To do so you can check the Enable Condition box (Open the advanced settings to view this setting)
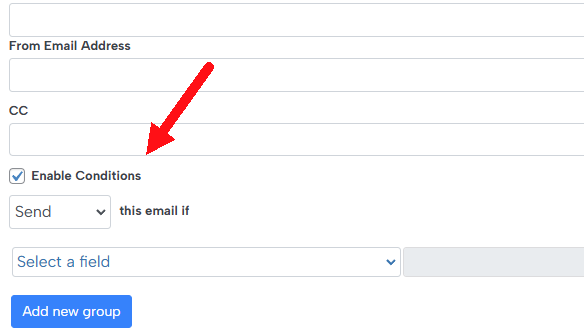
Then set up the condition as you want it. Using the previous example, my condition should look like this:

Using smart tags
In your email content, you can use the “Smart Tag” option to add information about the entry (like the value of a field or entry number)
To add a smart tag click on the “Smart Tag” button

This will open a pop-up where you can select the data that you want to add

Configuring the field summary
The field summary is a tag that you can add when you click the “Template” button. This template lists all the filled fields in the form.
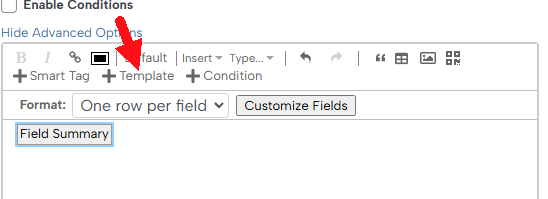
It has two formats that I will explain with an example. Let’s say you have this form:

If a user submits this form (filling in all the fields) the field summary template can include the fields in two ways.
One row per field: In this format, it doesn’t matter if your form has many fields in a single row, this format will list them all in their row

Same as form: This format will respect the layout of the form to list the fields.

Customizing fields in the field summary
As I explained earlier, the field summary displays all the filled fields, but sometimes you might not want to include certain fields, even when the users fill them. Or maybe you want to change the formatting or layout or a field. To do so click on the “Customize fields” button.
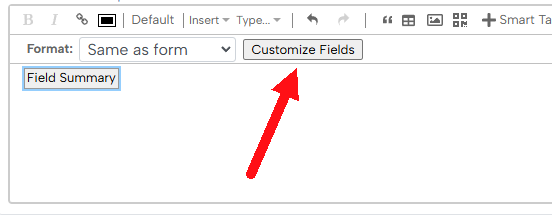
Then click on “Customize field” to start customizing the field you want

Then select the field that you want to hide or customize

And lastly, to the changes you want.

The field I selected only has one available customization called “Visibility” which is used to define if the field should be included in the email or not. But depending on the field selected it might have other options. For example, the image picker has additional customization to define if you want to include the image, text, or both in the email
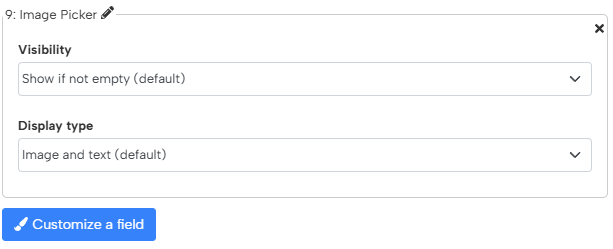
Is important to notice that these additional customizations are created per user requests so if there is a customization that you would like to be included please let us know in the plugin forum
Using Conditional Content
As explained previously, you can use conditional logic to define if an email should be sent or not, but sometimes all you want to do is define if some pieces of the email should be included or not.
For example, you might want to include links to the VIP Membership Program if the user belongs to a specific role or fills the form in a certain way.
To create conditional content click on the “Condition” button
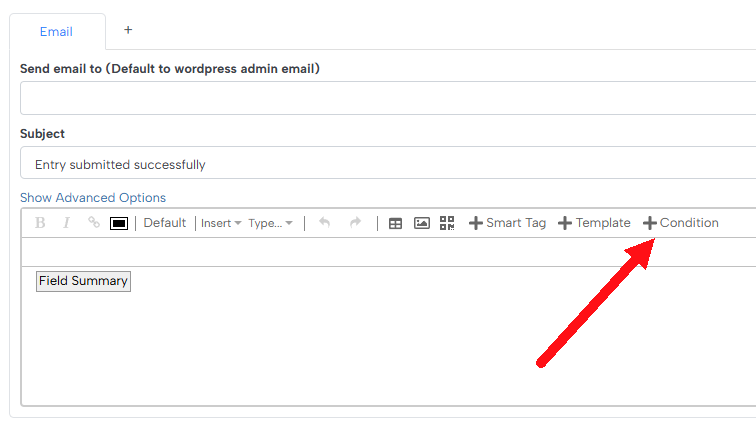
Then in the pop-up that is displayed define your condition, the example below would include the content only when “Product 1” is selected.

Lastly, in the “Conditional Group” block define your conditional content

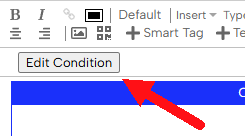
If you later want to edit your condition click on the “Edit Condition” button
Adding QR Codes
If you want to include a QR code button
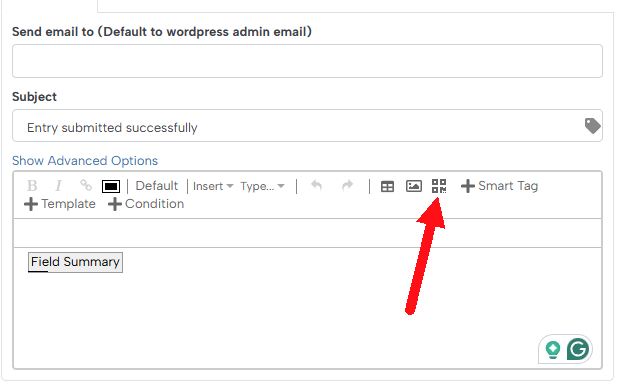
Then define the content of your QRCode

This section works similarly to the subject setting in which you can click on the tag icon to add entry information to the QR code.
Creating multiple emails
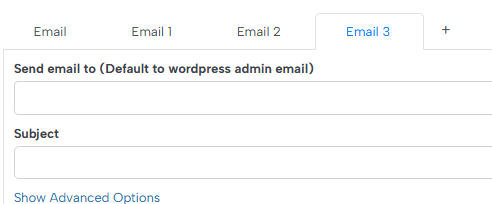
You can also create multiple email templates, to create another email template click on the plus icon at the top of the email builder.
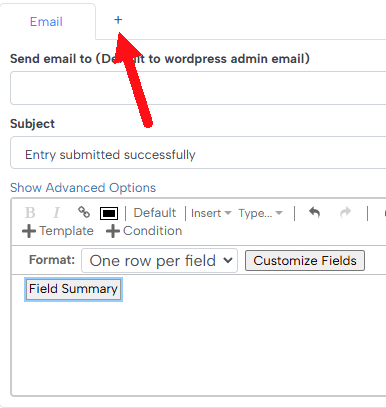
You can remove or rename the email template by hovering over the email tab and clicking on the X or pencil icon respectively

Conclusion
After reading this guide you should be ready to set up any kind of email you want. The email builder offers a lot of customization and features to make your life easier but if you would like something else added please don’t hesitate to let us know in the AIO Forms forum.
