With the automation add-on, you can execute actions like
- Sending emails
- Updating an entry
- Add a comment to an entry
- Send the data to a third-party app
When an action is executed such like:
- A form with specific information is submitted
- An entry is updated or deleted
- A button created by the “Pages” or entries add-on is clicked
To create an automation do the following:
1.- Go To AIO->Automation

2.- Click on “Create new automation”

3.- Select a form and a trigger type, depending on the trigger type the automation will be executed after an action is executed like submitting a form

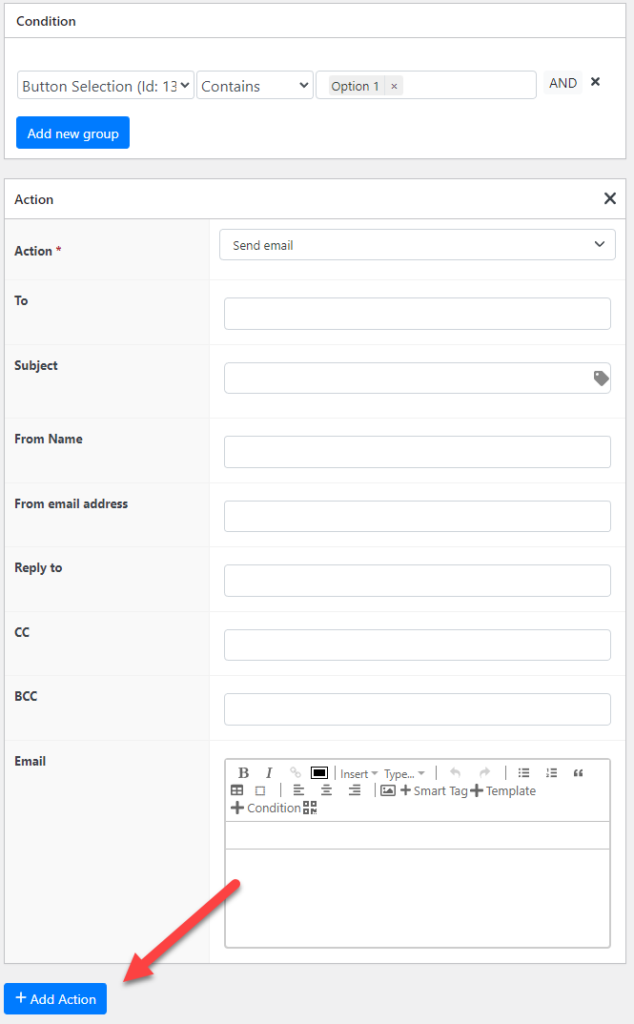
4.- (Optional) Define a condition, if defined the trigger will be only executed if the entry met this condition. In the example below the automation will be executed only when the field called “Button selection” has the option “Option 1” selected.

5.- Select an action, this is the action that will be executed when the trigger is fired

6.- Depending on the action selected you will need to fill in different fields, for example, if you select “Send email” you also need to configure this email

7.- (Optional) If you want you can configure additional actions, all these actions are going to be executed when the trigger is fired

8.- By default all the new automation are disabled so you need to activate it so it is executed

And that’s it! now your automation is going to be fired automatically when your trigger action is performed. This is just the tip of the iceberg though with the automation add-on you can do a lot more stuff like adding a button to the entries screen or even an email that when clicked will automatically perform the automation, this will be covered in another tutorial.

Would you like to get more than one add on?
Check out our bundles and get several add ons at a HUGE discount
View Bundles