Connect your form to more than 4,000 different services through Zapier
Use Zapier to connect your forms to hundreds of different services via your WordPress forms, no coding required.
Features
- Automatically send the submitted information to another service available on Zapier such like Sap, Salesforce, CRMs and much more.
- No coding is required, all you need to do is configure your zap
How to configure a zap (example)
1.- Install and activate the plugin
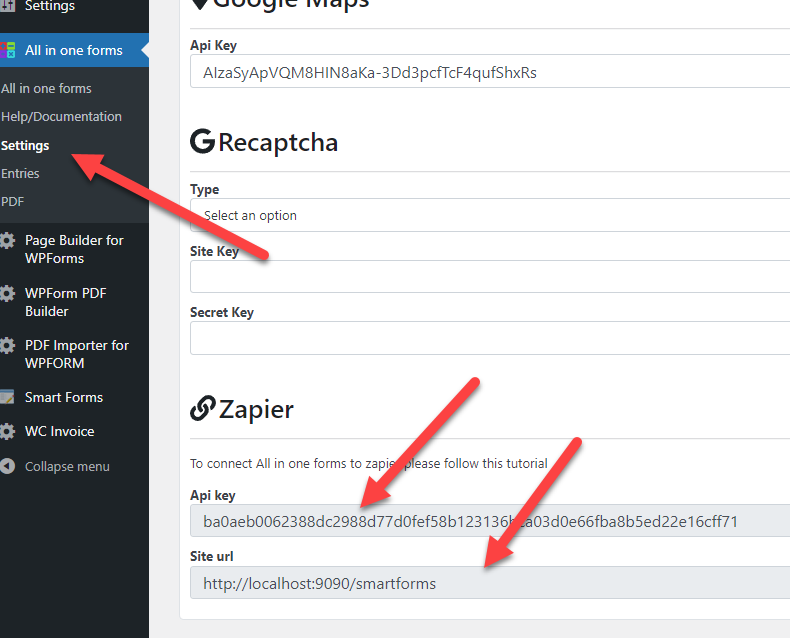
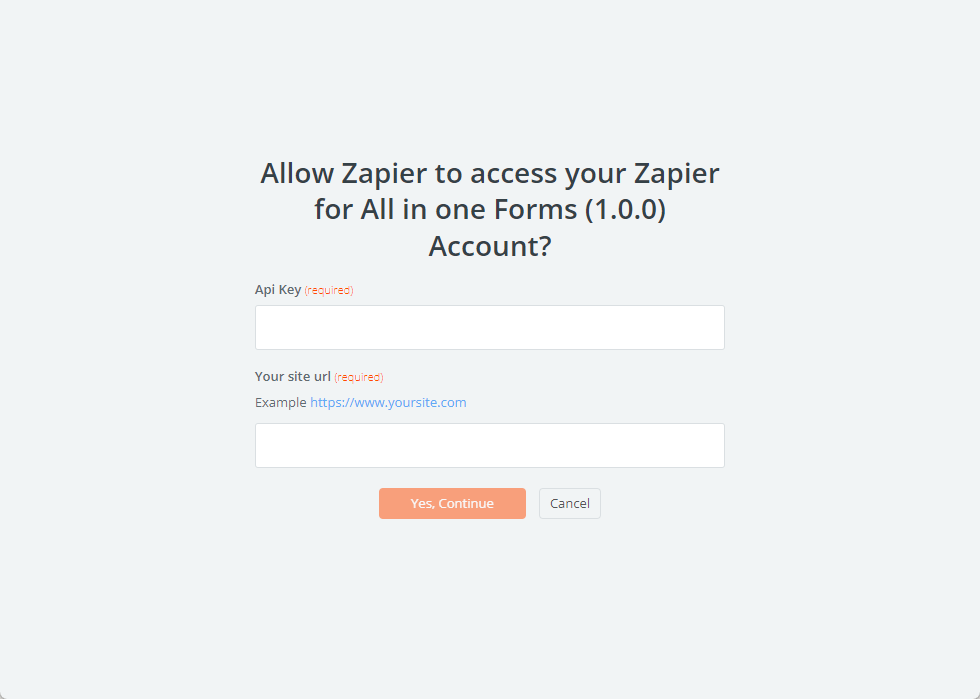
2.- Go to the “All in one forms” settings and find your API key and site URL, you will need this information later.
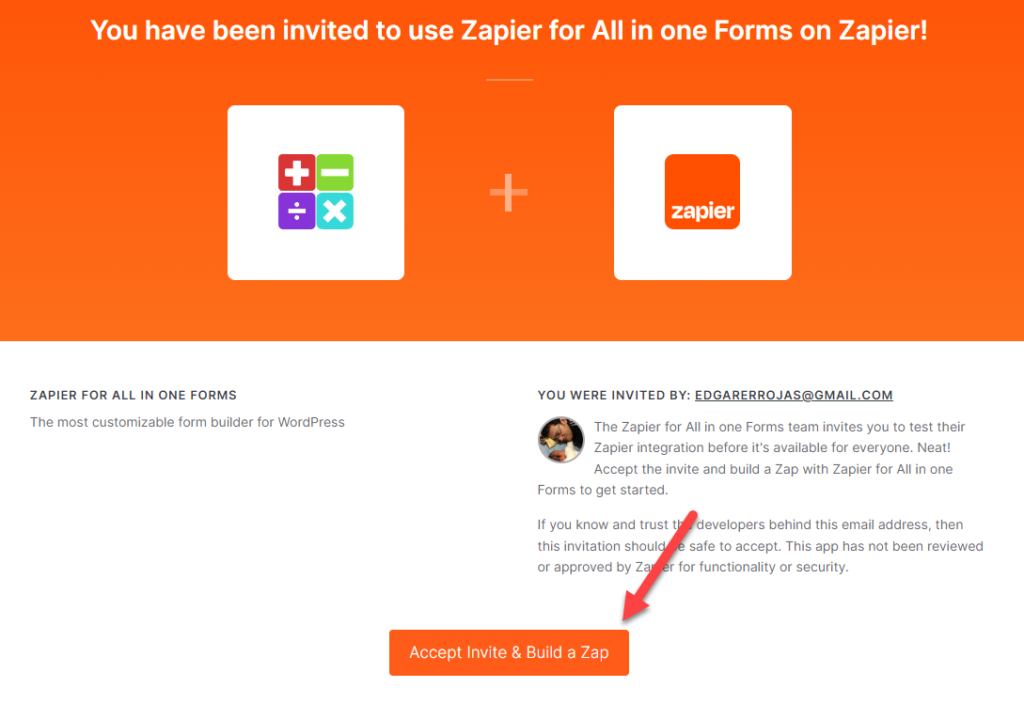
3.- Go to this page to enable “All in one forms” in your Zapier account: https://zapier.com/developer/public-invite/177368/8ef95dfe15e868dba95efed93fc1914f/
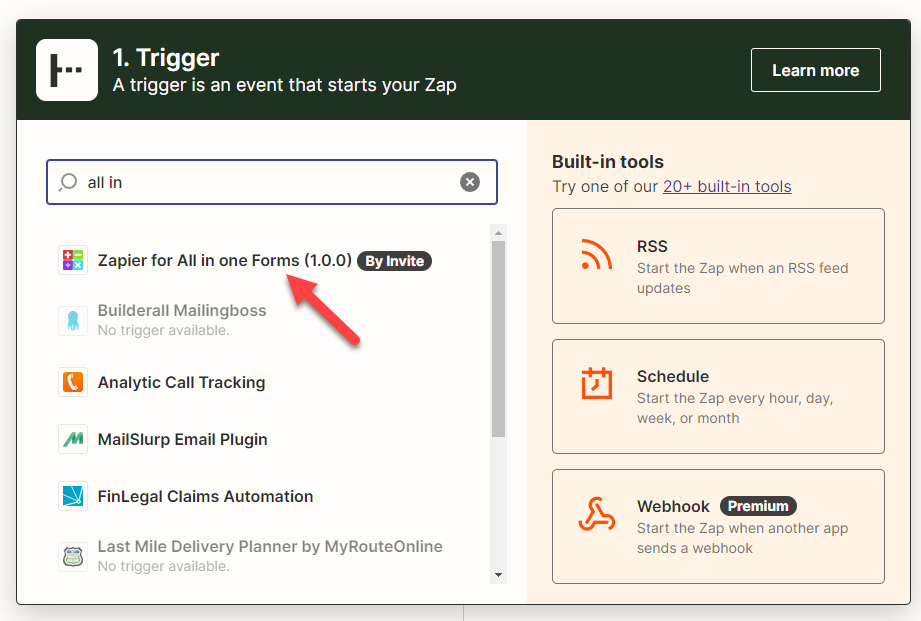
4.- Create a new zap using “Zapier for All in one forms”
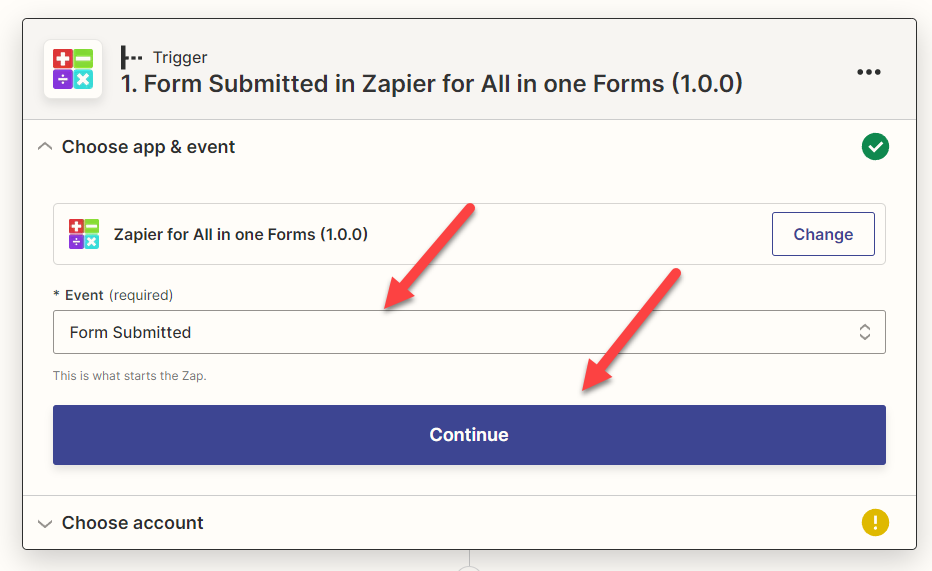
5.- Select the event “Form Submitted” and click on “Continue”. This event will be fired every time a new entry is submitted and will send it automatically to Zapier.
6.- Connect your site to Zapier using the site and API key that you got in the first step
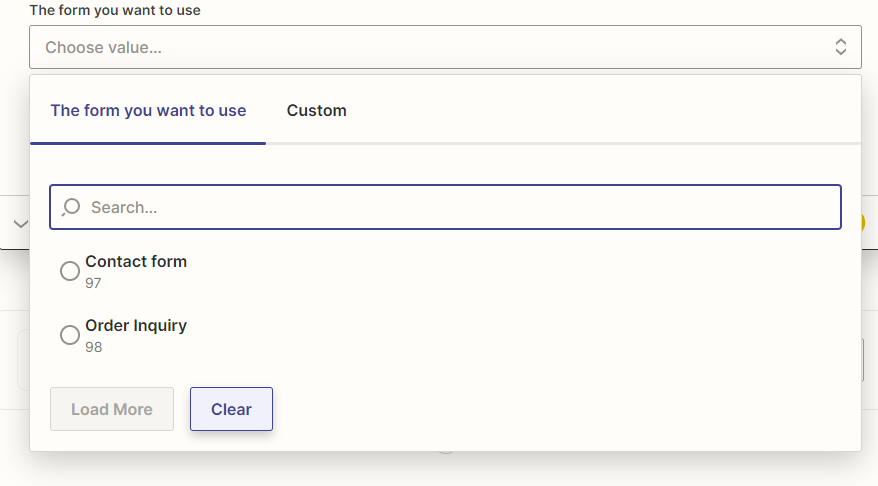
7.-In the field “The form you want to use” you will see a list of all the forms on your site. Select the one you want.
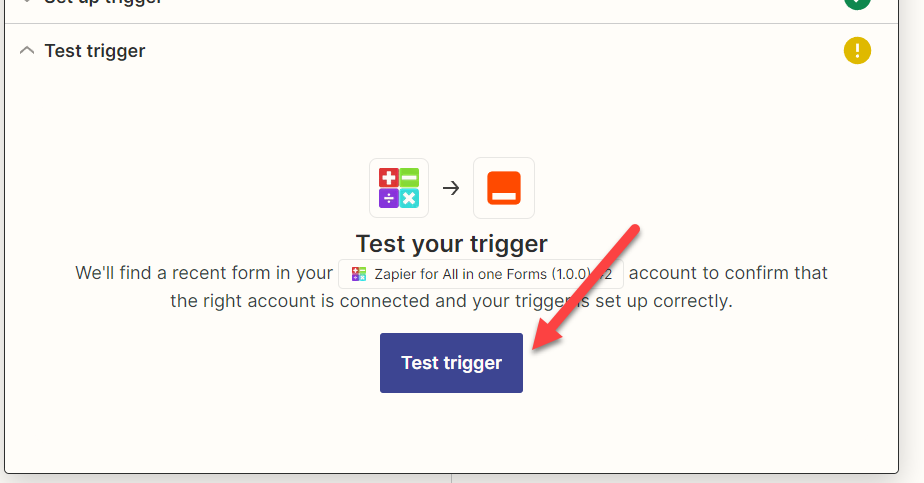
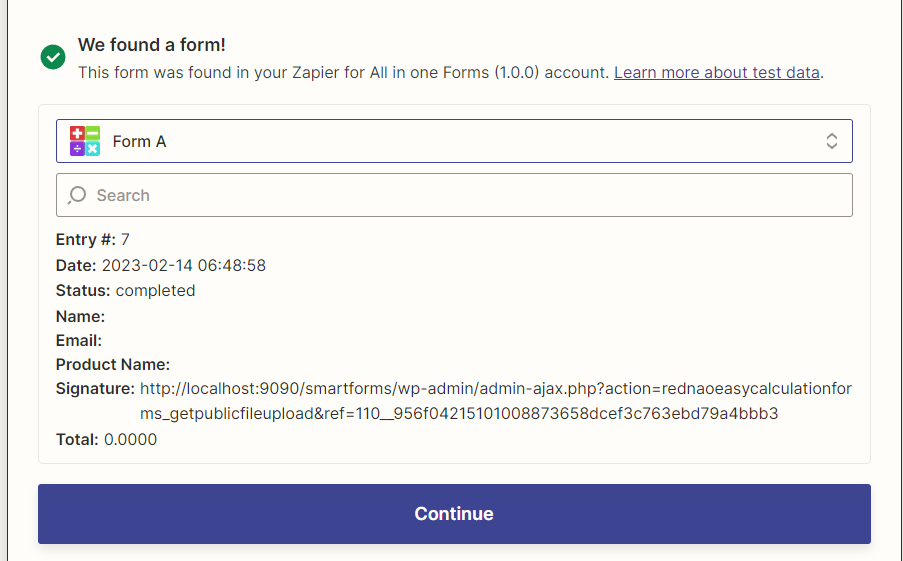
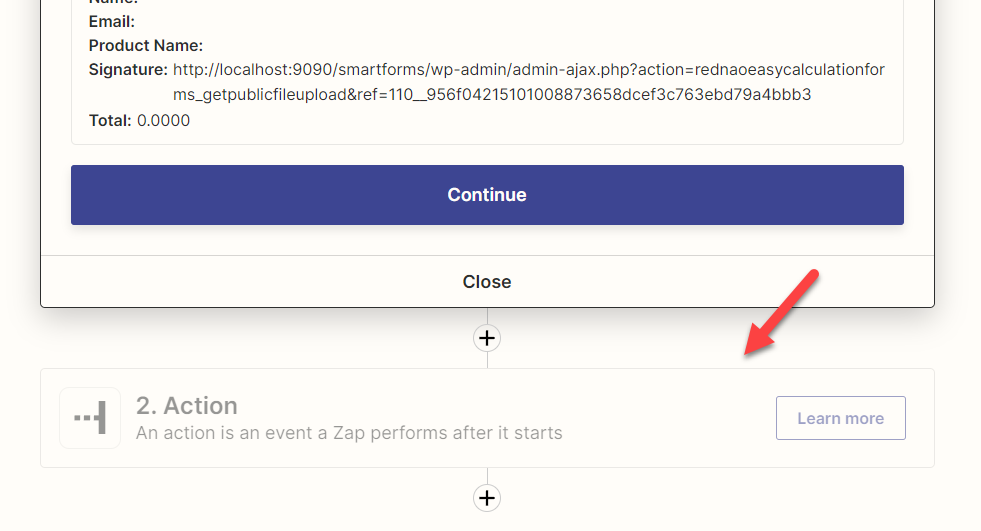
8.- Optional.- Test the trigger, after clicking test you should see a preview of the information retrieved from your site (in this case it will be the last entry of your selected form)
9.- Click on “Action” and define what you want to do with the entry
10.- For this tutorial, I will configure a zap to send the entry to a Google sheet. My Google sheet has 3 columns which are “Company”, “Product Type” and “Product”, Zapier let me map these columns to any of the fields of my form
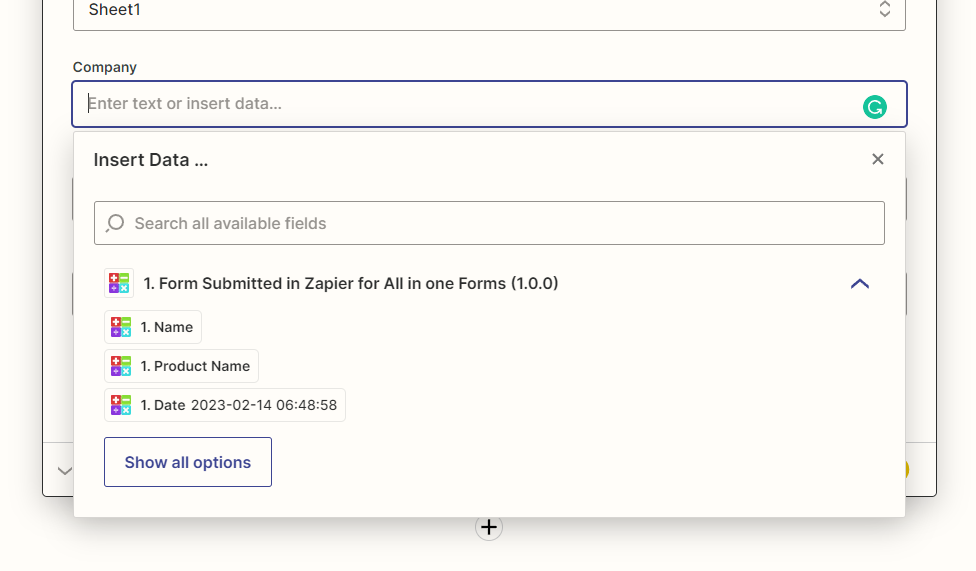
After finishing configuring your spreadsheet you just need to click on continue and that’s it! Now the entry will be sent to Zapier automatically after an entry is submitted.
Would you like to get more than one add on?
Check out our bundles and get several add ons at a HUGE discount
View Bundles